Earring Care Guide: How to Clean Earrings at Home


Best Way to Clean Earrings
When I was younger, my Nana used to wear a lot of jewelry. She didn’t only sport them on special occasions; it was an everyday occurrence. She wanted to feel beautiful! She treated every day as something to celebrate, and wearing her favorite jewelry was part of it, too.
In her bathroom, this little white box was plugged in, and I never knew what it was.
It wasn’t until one morning after I slept over that I heard something buzzing from the bathroom, and my young curiosity made me go check it out.
I asked her what it was, and she said it had cleaned her jewelry.
She opened it, and it was a little bowl with a cleaning solution. It would gently vibrate. This was enough to thoroughly clean her rings, necklaces, and bracelets, but mostly it was for her earrings.
My Nana said it was important to clean them often because they can get dirty with sweat.
I was a little confused because I never washed my earrings, and I wore them all the time! She asked me to take them out, and she put them in the bowl (after she took out her jewelry). After 20 minutes, I looked back at the little machine, and it was dirty!
Ever since that moment, I always washed my jewelry.
I don’t have one of those machines, but they aren’t necessary to clean your earrings.
The Importance of Earring Hygiene and Maintenance
It’s important to clean your earrings regularly because dirt and bacteria can build up quickly. After a while, this may cause irritation or infection when in contact with your skin. Proper cleaning also extends the life of your earrings by preventing tarnishing and other damage.
The Different Types of Earrings and Their Unique Cleaning Needs
The first step to proper care is to understand the various types of earrings and the materials they are made from. For instance, cleaning diamond studs differs significantly from maintaining delicate threader earrings.
Stud Earrings
Stud earrings are a staple in many jewelry collections. Typically, they consist of a single gem set in metal, with a post that passes through the earlobe, secured by a clasp on the other side. A simple soak and gentle scrub will keep them shining.
Hoop Earrings
Hoop earrings come in various sizes, ranging from minimalist to statement pieces. Due to their design, they can accumulate more dirt and require a more thorough cleaning technique.
Drop Earrings
Characterized by their hanging feature, drop earrings often have intricate designs that necessitate careful cleaning to preserve details and prevent damage.
Threader Earrings
Threader earrings have a minimalistic and fashionable appeal but require a unique approach due to their design, which threads through the earlobe.
Clip-On Earrings
Clip-on earrings offer versatility for those without pierced ears. Cleaning them usually involves removing the clips and applying specific care to the ear pads.
Chandelier Earrings
Chandeliers are meant to be noticed, but so is dirt or tarnish. Their multi-tiered structure demands an attentive yet delicate cleaning strategy.

Step-by-Step Guide to Earring Cleaning at Home
Here’s a step-by-step guide to ensure a thorough and safe cleaning:
Gather Your Supplies
Before you begin, make sure you have the right tools on hand. You’ll need a soft microfiber cloth, a small bowl, lukewarm water, mild dish soap, a soft-bristled toothbrush (non-abrasive), and earring backings.
Pre-Cleaning Inspection
Examine your earrings for loose stones, damaged settings, or other issues. If you spot any problems, it’s best to have them repaired by a professional jeweler before cleaning.
Choosing the Right Cleaning Solution
The cleaning solution you use depends on the material of your earrings. For example:
- Diamonds and hard gemstones can handle water, ammonia, and mild soap.
- Gold and silver can be used in a simple solution of water and mild dish soap.
- Pearls and opals require an ultra-soft solution; substances like vinegar or alcohol can harm these delicate materials. (Even wearing perfumes with your pearls can cause damage after a while!)
- Avoid harsh chemicals or abrasive cleaners, as they can damage your earrings.
The Cleaning Process
- Fill a small bowl with lukewarm water and add a drop of mild dish soap.
- For studs and hoops, soak them in the solution for 5-10 minutes to loosen dirt.
- Gently scrub the earrings with a soft-bristled toothbrush to remove any residues.
- Rinse the earrings under running water to remove soap and pat dry with a clean, soft cloth.
- Use a cotton swab soaked in the solution for designs with intricate patterns to reach all areas.
- Be especially cautious with any connected parts or sensitive materials, and avoid excessive force that might bend or break the earring.
- Once cleaned, leave your earrings to air dry completely before storing or wearing them.
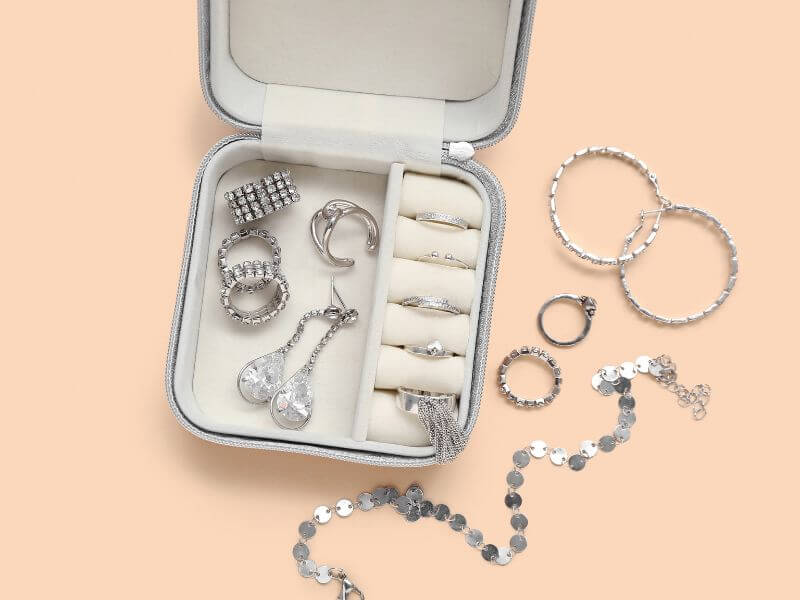
Proper Earring Storage to Preserve their Beauty
Storing earrings properly is just as important as cleaning them. It helps prevent tarnishing, scratching, or even losing them. Here are some storage tips:
- Store each pair separately to avoid scratches and tangles.
- Use a jewelry box lined with soft fabric or a padded earring organizer.
- If using a jewelry pouch during travel, ensure that it’s padded and earrings are adequately secured.
- To avoid misplacing them, keep the earring backs in one specific place with the pair they belong to.

Best DIY Jewelry Cleaning Solution
For those looking to maintain the shine and cleanliness of their earrings without resorting to store-bought solutions, an effective and simple DIY method works wonders for most types of jewelry.
Ingredients:
- 2 cups of warm water
- 2 tablespoons of baking soda
- A few drops of mild dish soap
Instructions:
- Mix the Solution: In a small bowl, combine the warm water, baking soda, and a few drops of mild dish soap. Stir gently until the baking soda is completely dissolved.
- Cleaning the Jewelry: Submerge your earrings in the solution and let them soak for 15 to 20 minutes. This allows the solution to break down any oils, dirt, or tarnish buildup.
- Gentle Scrub: After soaking, use a soft-bristled toothbrush to gently scrub the earrings. Focus on areas where dirt has accumulated, but be careful around delicate stones or settings.
- Rinse and Dry: Rinse the earrings under lukewarm running water to remove any cleaning solution residue. Pat them dry with a soft, lint-free cloth. Ensure they are completely dry before storing or wearing them.
This DIY cleaning solution is safe for most metals and gemstones, including gold, silver, diamonds, and hard gemstones. However, it is advisable to avoid using this solution on softer or porous stones like pearls, opals, or turquoise, as they require more specialized care. When in doubt, consulting a professional jeweler for advice on cleaning specific types of earrings is always the best course of action.
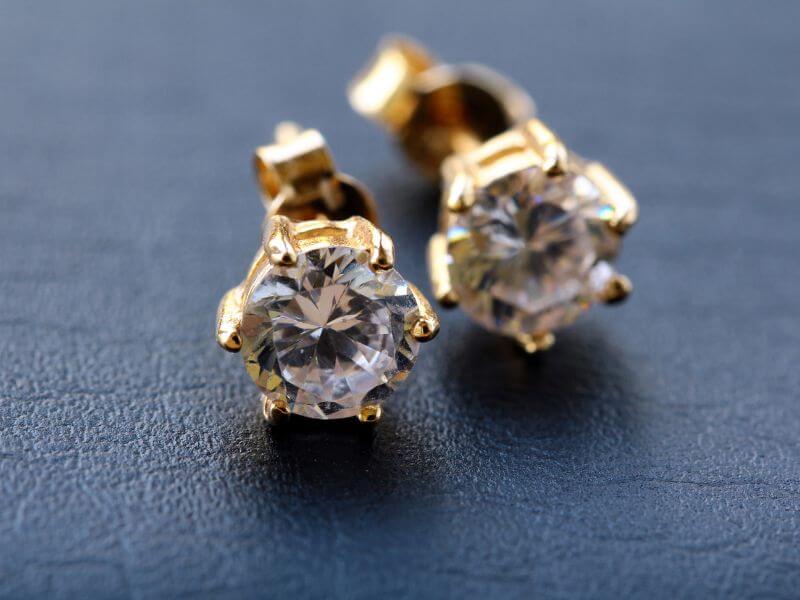
How to Clean Stud Earrings
To clean stud earrings, particularly those embellished with precious or semi-precious stones, it’s critical to handle them carefully to prevent damage to the stone or setting. Begin by preparing a mild cleaning solution—mix a few drops of gentle dish soap with warm water in a bowl. Submerge your stud earrings in the solution and allow them to soak for 15-20 minutes. This soaking process helps loosen any accumulated dirt or oils.
After soaking:
- Use a soft-bristled brush, such as a baby toothbrush, to gently scrub the earrings, focusing on the gemstone and any intricate designs around the setting.
- Be cautious around the prongs to prevent loosening the stone.
- Rinse the earrings under lukewarm running water to wash away any residue.
- Close the drain or cover it with a strainer to avoid losing them.
Next, pat the earrings dry with a soft, lint-free cloth. If you have a pair of stud earrings with particularly sensitive stones, like opals or pearls, skip the soaking step. Instead, dampen the cloth with the soapy water and gently wipe the earrings to clean them. Always avoid using harsh chemicals or abrasive materials, as these can damage the metal and the gemstones.
Allow the earrings to air dry completely on a clean, soft cloth before storing or wearing them again. Following these detailed steps, regular cleaning ensures that your stud earrings remain dazzling and secure for years to come.
How to Clean Gold Earrings
Cleaning gold earrings with precision and care keeps them shining brilliantly for years. Mix a mild, non-abrasive cleaning solution—preferably lukewarm water and a few drops of dish soap to clean gold earrings effectively.
Immerse the gold earrings in this solution, allowing them to soak for approximately 10 to 15 minutes.
This soaking period helps to loosen accumulated grime and body oils.
After soaking, gently brush the earrings with a soft-bristle toothbrush, paying close attention to crevices and behind the gem settings, where dirt is prone to accumulate. Be gentle to avoid scratching the gold surface or dislodging any gemstones.
Rinse the earrings under lukewarm, running water to remove soap suds and any dislodged dirt. Ensure the water flow is gentle to prevent the earrings from being swept away.
Afterward, dry the earrings thoroughly with a soft, lint-free cloth, ensuring they are entirely devoid of moisture before storage or wear.
Consider using a cleaning solution specifically designed for gold or consulting a professional to clean intricate designs or heavily tarnished gold thoroughly. This process restores the luster and prevents potential damage from buildup or incorrect cleaning methods.
Regular maintenance ensures that your gold earrings remain a dazzling asset to your jewelry collection.

Common Cleaning Mistakes and How to Avoid Them
When it comes to earring cleaning, missteps can lead to irreversible damage. Here are some common mistakes and how to steer clear of them:
Over-Scrubbing
Scrubbing imparts more harm than good. It can loosen stones or scratch metal. Always use a light touch and opt for non-abrasive tools.
Using the Wrong Solution or Cleaner
Household products like bleach or toothpaste are too harsh for cleaning jewelry. Stick to mild cleaners designed for jewelry care.
Neglecting Regular Cleaning
Regular cleaning prevents buildup that’s harder to remove. Depending on how often you wear them, aim to clean your earrings every few weeks.
Failure to Dry Thoroughly
Moisture can contribute to tarnishing and damage. Always ensure your earrings are completely dry before storing them.
Professional Earring Cleaning Services
Professional cleaning can be a worthy investment for heirlooms or more complex or valuable pieces. Services offered range from ultrasonic washing to steam cleaning, ensuring your earrings receive the best care possible.
I’m always eager to read your next post.